Creating elevation views with API
Creating section views at given location and direction with Revit API is relatively easy. You just have to create a right Bounding Box (it’s dimensions and transformation) and pass it as a constructor function parameter. Unfortunately it is not so easy with elevation views.
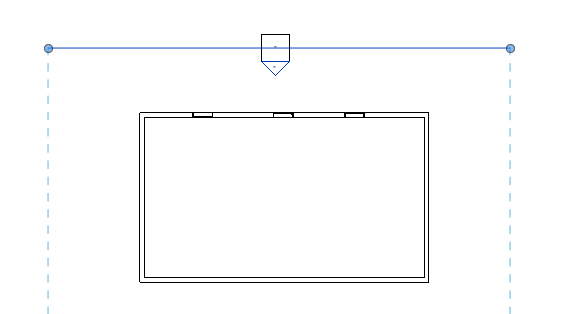
The elevation views in Revit are not independent – they have to belong to a specific elevation marker. Therefore the viewing angle, for instance, is controlled by rotating the marker – not the view itself.
Moreover, viewing range is also not related to the Bounding Box, but controlled with a “Far clip offset” parameter
So, to start making elevation views we have to create the marker:
ElevationMarker marker = ElevationMarker.CreateElevationMarker(doc,viewFamilyType.Id,center,50);
where “doc” is a Revit document, viewFamilyType is a view type and “center” is a location point. The last parameter sets the scale.
After that we can create elevation view for the marker:
ViewSection elevationView = marker.CreateElevation(doc, view.Id,0);
Parameters here are: a Revit document, id of a plan view (where the marker is visible) and an index. Each elevation marker can contain up to four views – indexed from 0 to 3.
For the 0 index elevation view (different indexes might differ) we set Bounding Box like so:
BoundingBoxXYZ bb = elevationView.get_BoundingBox(null);
bb.Min=new XYZ(center.Y-width/2,center.Z,0);
bb.Max=new XYZ(center.Y+width/2,center.Z+height,0);

elevationView.CropBox = bb;
Finally we just have to set the depth parameter and rotate the marker:
Parameter p = elevationView.get_Parameter(BuiltInParameter.VIEWER_BOUND_OFFSET_FAR);
p.Set(depth);

Line l = Line.CreateBound(center,center+XYZ.BasisZ);
ElementTransformUtils.RotateElement(doc,marker.Id,l,angle);
The complete function might look like this: