We have done already a lot of boiler plate code to setup the basic systems in this project. It is time to finally create something more fun and see the effects of our work. In this part we are going to start with procedural generation of the dungeons. (yaaay!)
The final code for this part can be found here: https://github.com/maciekglowka/hike_deck/tree/part_09
General layout
It is no secret that generating roguelike maps mean mostly placing rooms and connecting them with tunnels. That's what we are going to do here as well. However I'd like to also have a little bit of control over the higher level architecture of the dungeon. My aim here is to divide the board into a few distinctly featured parts to encourage player's exploration. I do not plan for the maps to be very complex or large though - just enough to spread places of interest quite apart.
I do not want to dive into very complex algorithms here as well - to keep things manageable (although I think we are going to need more than one blog post on that anyway). We are simply going to split the dungeon into a grid of sub areas, where each area will be a separately generated bunch of rooms. The areas might end up having unique features: Eg. one could be an area with an upgrade to find. Other might be a monster lair, etc. We are probably also going to use separate areas for the entrance and exits (to make sure they're not right next to each other).
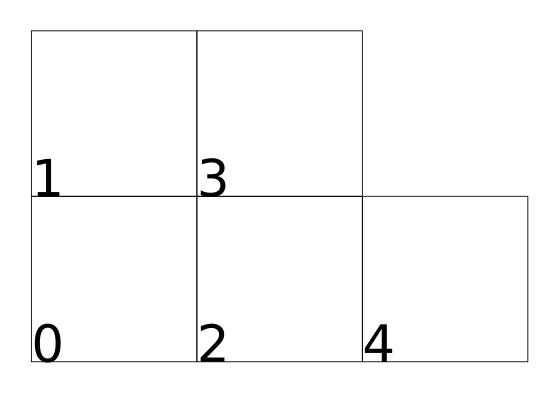
The areas will be placed on an uneven rows/columns grid. (the order of the placement can be seen on the image above) We will make the code flexible enough to adjust the number of the rows, however we'll probably stick with just two for now. The column number will be decided dynamically - based on the areas inserted.
We are going to locate the dungeon generation code in the board module, but as I expect it to grow in the future let's already create an entire directory submodule for that:
src/
├── actions
│   ├── mod.rs
│   ├── models.rs
│   └── systems.rs
├── assets.rs
├── board
│   ├── components.rs
│   ├── dungeon
│   │   ├── mod.rs
│   │   └── room.rs
│   ├── mod.rs
│   └── systems.rs
// cut
As you can see I've already placed two files there: the main mod.rs and an extra one for the rooms. We are going to add some more soon, but for now let's focus on our Room struct:
// board/dungeon/room.rs
use *;
use HashSet;
use crateVector2Int;
The room is a simple struct, defined by two corners - the bottom-left a and top-right b. We also include some helper methods, that will become handy very soon.
Also note: we are going to use the rand crate here, so don't forget to add it to your cargo dependencies. The current version I am using in the project is rand = "0.8.5".
Let's define struct for the areas in a similar fashion (add an area.rs file):
// board/dungeon/area.rs
use HashSet;
use crateVector2Int;
use Room;
As you can see the definition is slightly more complex. First of all the area will consist of two fields (for now): a vec of rooms and a vec of paths. For the paths we are not going to define a separate struct - a vec of Vector2Ints should be ok for now.
The shift function is going to let us reposition the areas within the dungeon grid. (as each area will be initially generated separately - in it's own space). The generate_rooms method creates two hard-coded rooms for now - it will let us test the layouting before we start with more complex generation. The rest of the methods should be quite self-explanatory, so I will skip their description :)
Now we are ready to finally define the Dungeon itself:
// board/dungeon/mod.rs
use HashSet;
use crateVector2Int;
pub use Area;
const AREA_SPACING: i32 = 4;
That's a lot of code again! And not all of it is very readable (oops!). Let's try to break it down a bit.
Our Dungeon struct is going to hold quite naturally a vec of Areas. Apart from that we are going to keep a field defining our grid. It is a vec (rows) of vecs (columns) containing indexes to the areas field. (we do not use references to make it easier for us to work with Rust's borrow checker ;) We are going to update the struct each time we insert a new area to the dungeon, so everything is properly synced. Please notice that because we chose an ordering system as on the image above, the first row will always be the longest one - so we can calculate the column count from it's length.
The position_areas method uses lots of iterators and might not be the clearest to read. It is not very complex tough. At first, for each row and column we look for the area with the largest dimension. Then we calculate offsets per each grid x, y position. Finally, we can shift the areas using that info.
The to_tiles method allows us to convert the dungeon struct into our board tiles easily. It's based on analogous methods in the room and area structs.
Now we can go back to our spawn_map system (from the very first tutorial part) and use the dungeon generator there:
// board/systems.rs
use *;
use HashMap;
use CurrentBoard;
use ;
use ;
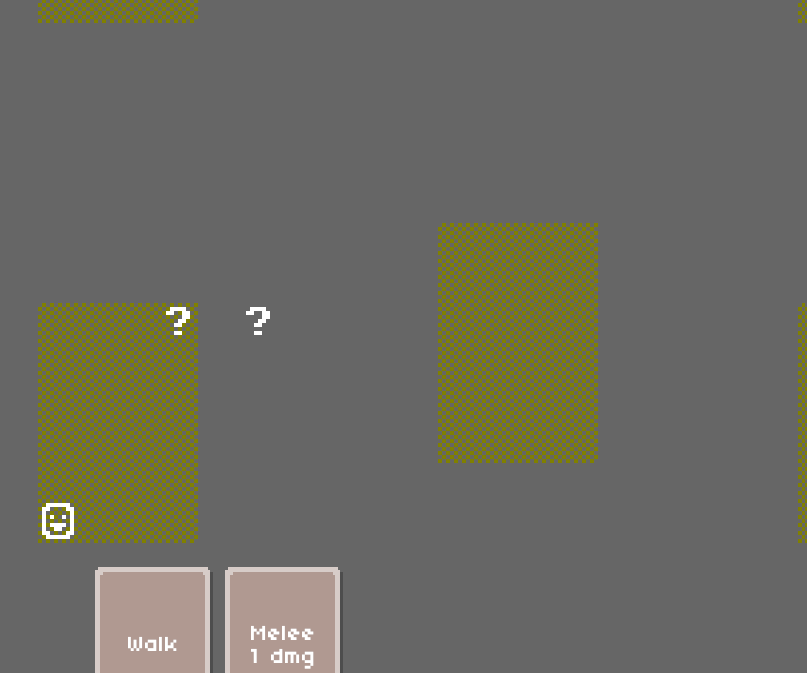
For the testing purposes we have inserted 4 separate areas to the dungeon. If you run the game now you should already be able to see the some rooms generated.
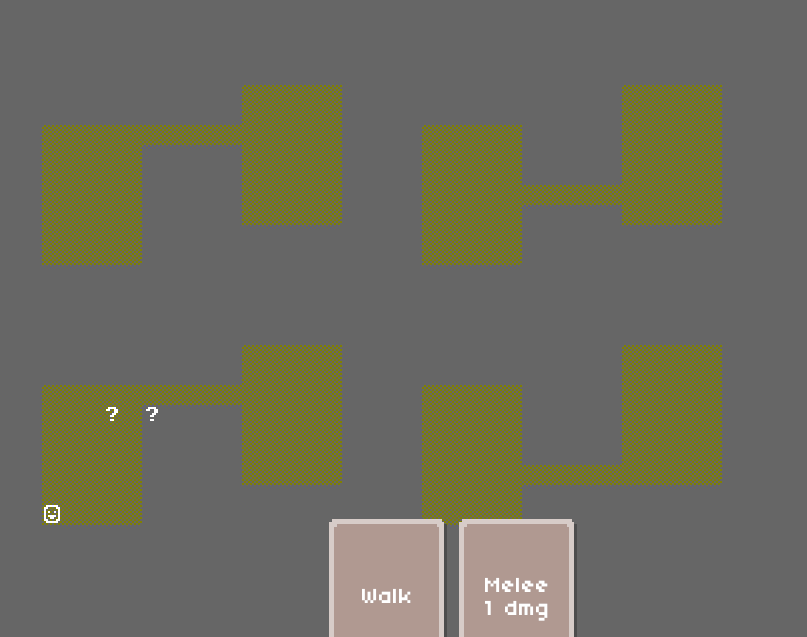
Tunnels
Now that we have some very basic rooms set up, we can try to connect them with tunnels. There are two very basic ways of generating corridors that come to my mind:
- L shaped join (first we go all the way horizontally and then vertically, or the other way around)
- interchanging short horizontal and vertical sections of a random length
We are going to implement both to see how they can be easily used interchangeably to add some variation to our dungeons.
Let's start by creating a new tunneler.rs file:
// board/dungeon/tunneler.rs
use ;
use crateVector2Int;
;
;
As a first thing - we define a trait for our tunnelers, so they can share a common interface.
Then we create the two implementations mentioned above. The L-shaped tunneler creates just two sections, a horizontal and a vertical one. First one being the longest one.
The random tunneler with each step makes a decision about a direction to take. Based on a weighted random function. If we are further away on the x-axis from the target, we are more likely to pick the horizontal direction. Also we only walk towards our target. Eg. if we have to move 5 tiles right and 3 down, we can only draw positive x values and negative ys.
Let's now include the tunneler object in our Area struct (so each area can have a different character):
Let's also change the dungeon generator code in the spawn_map system to use both tunneler algorithms, so we can test them:
let mut dungeon = new;
for idx in 0..4
dungeon.generate;
Now let's use our tunnelers to internally connect rooms in the areas:
// in board/dungeon/area.rs
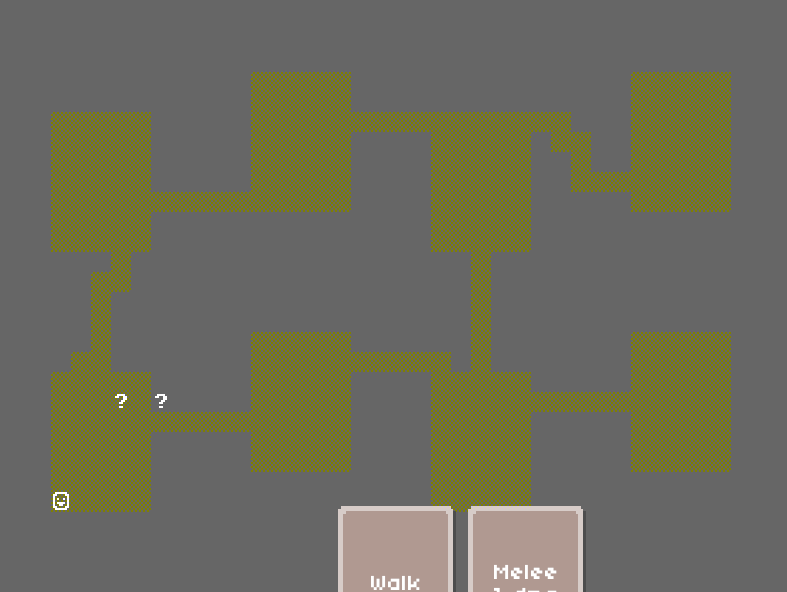
We can now run the game and check if our connections are working, but before we do that let's change temporarily the camera to see the entire map:
Joining dungeon areas
There is one last thing that we are going to tackle in this part. We will use our tunnelers to connect the separated dungeon areas. We will do so by finding a closest pair of rooms between the areas we want to connect. And then we will create a tunnel joining them (just as above).
Our method for finding the correct room pair is going to be rather crude and will take into account only rooms' corners. (so it might happen that in reality there is a closer pair based on edge to edge or edge to corner distance).
I know it's a lot of nested iterators, but it gets the job done :)
// in board/dungeon/area.rs
Having that, we can create simple method in the Dungeon struct that will iterate through the area grid and connect neighbouring locations:
// in board/dungeon/mod.rs
We simply just connect non-zero indexed areas to their left or bottom neighbours - that's it. Now if you run the game you should finally see the entire map connected :)
Next time we are going to randomize the room generation to finally have some nicer looking maps.